Thinking about cleaning your split system air conditioner yourself? Awesome! It’s a great way to keep your home cool, save on energy bills, and avoid unexpected breakdowns. But—before you grab any tools—let’s walk through the safest and most effective way to do it, step by step.
Step 1: Safety First (Seriously!)
Before you touch anything, turn off the power to both the indoor and outdoor units. Unplug the outdoor unit if possible.
Quick Safety Checklist: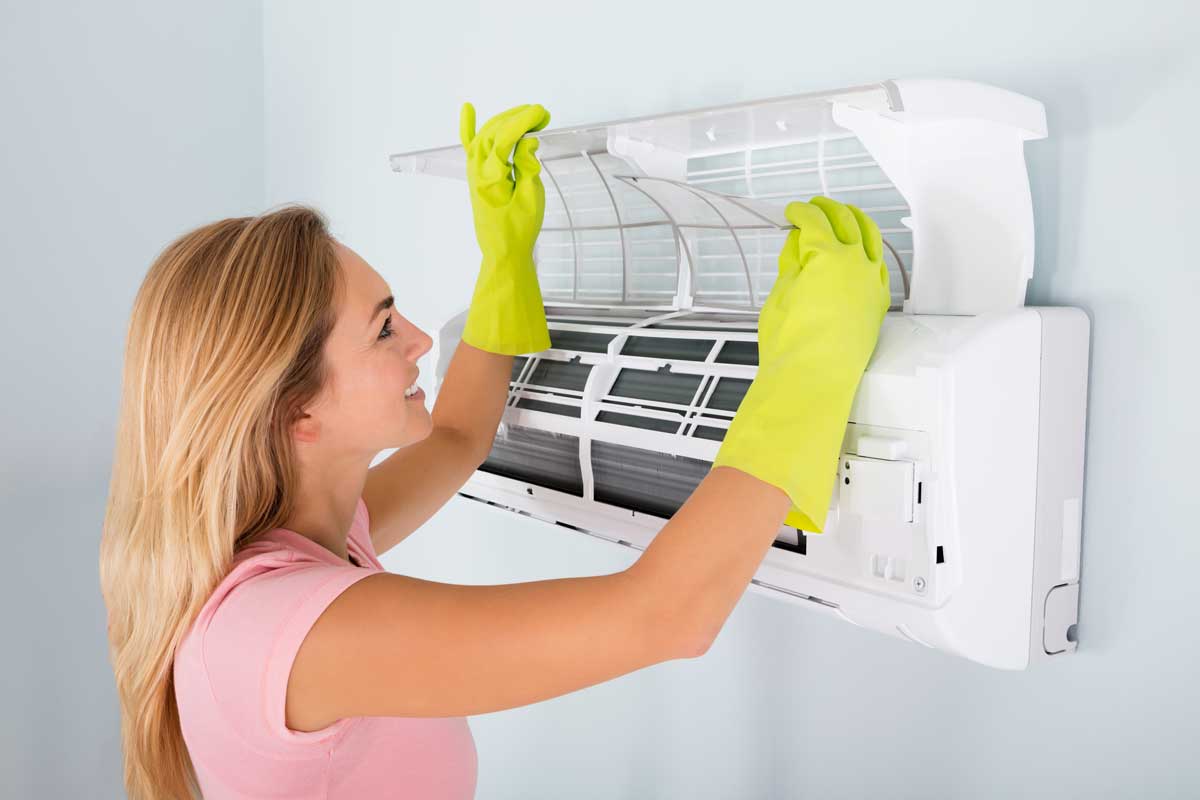
Clear the area of clutter, pets, and kids.
Check for hazards: sharp edges, puddles, fragile parts.
Wear insulated gloves, eye protection, and shoes with good grip.
Don’t use water or a pressure washer on anything electrical.
Noticed a weird smell, loud noise, or what looks like a refrigerant leak? Stop and call a pro. Don’t try to fix those yourself!
If you need expert assistance, consider reaching out to Advanced Clean Air Gold Coast for professional air conditioner cleaning and maintenance.
Pro Tip: Keep a small first aid kit nearby and know who to call for help in case something goes sideways.
Step 2: Gather Your Cleaning Gear
Here’s what you’ll want handy:
Basic tools: Insulated screwdrivers, utility knife, multimeter
Protective stuff: Gloves, goggles, non-slip shoes
Cleaning supplies: Soft brushes, microfiber cloths, mild soap, spray bottle, coil-safe cleaner
HVAC extras: Fin comb, leak-detecting solution, thermometer, flashlight, small waste bin, sealant tape, zip ties
Make sure you’ve got somewhere clean to set parts down, and keep your workspace well-ventilated.
Step 3: Cleaning the Indoor Unit
Let’s tackle the main spots that get gross inside:
- Air Filter
Open the access panel and slide the filter out.
If it’s reusable: Vacuum off dust, then wash with mild soap and lukewarm water.
Rinse completely and let it air-dry before putting it back.
If it’s worn out: Just replace it!
- Coils
Use a soft brush or a no-rinse coil cleaner (follow the label directions).
Avoid metal tools—they can easily bend those delicate fins.
If you notice any bent fins, gently straighten with a fin comb.
- Drainage Pan & Line
Check for blockages or gunk.
Use a flexible brush or pipe cleaner to clear the line.
After you’re done: Reassemble, turn the power back on, and make sure the air’s flowing strong.
Step 4: Cleaning the Outdoor Unit
Outdoor units work hard and get dirty fast!
Here’s what to do:
Clear leaves, grass, and debris from around the unit.
Shut off the outdoor disconnect and breaker before you open anything.
Use a soft brush or low-pressure hose to clean the outside and fins (don’t bend them).
For tough grime, use a coil cleaner—just avoid getting water on any electrical bits.
Double-check that the fan spins freely and guards or drain lines aren’t damaged.
Tip: Always keep the area around the outdoor unit clear for best airflow.
Step 5: Keep It Running Smoothly (Maintenance Tips)
Want your system to stay efficient and reliable? Here’s how:
Monthly: Check and clean/replace filters, inspect for unusual noises, and keep an eye on coils.
After storms or lots of pollen: Give the outdoor unit a once-over and clear debris.
Seasonally: Have a pro check refrigerant and do a deeper clean.
Extra tips: Keep airflow unobstructed, clean drain lines, and shade the outdoor unit in summer if you can.
Quick-Reference Checklist
[ ] Power off indoor and outdoor units
[ ] Inspect area and put on PPE
[ ] Gather tools and cleaners
[ ] Clean indoor filter, coils, and drainage
[ ] Clean outdoor unit and check fins/drain
[ ] Reassemble and test airflow
[ ] Note any issues for professional help
Remember: Regular, careful cleaning keeps your split system humming, saves you money, and helps avoid those sweaty, repair-call afternoons. If anything feels out of your league, don’t hesitate to call a professional!